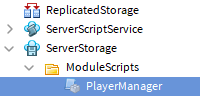
ゲームのループがコーディングされたら、いよいよ機能を追加していきます。試合中でも、プレイヤーはゲームに入ってきたり、出ていったりすることができます。このため、プレイヤーを試合に送り込んだり、試合中のプレイヤーを追跡したりするプログラムが必要になります。これらの処理を管理するために、PlayerManager という名前のモジュールスクリプトを作成します。
このスクリプトは、武器を持ったプレイヤーをアリーナに送り込む機能を始め、シリーズの後半で拡張されます。
スクリプトの設定
PlayerManager には、他のスクリプトで使用される関数が含まれているため、モジュールスクリプトになります。
- ServerStorage の ModuleScripts の中に PlayerManager という名前の新しいモジュール スクリプトを追加します。次に、スクリプト名と一致するようにモジュールテーブルの名前を変更し、ローカル関数とモジュール関数のコメントを追加します。
local PlayerManager = {}
-- Local Functions

-- Module Functions

return PlayerManager- 次のローカル変数を追加します。
Services/サービス
- Players:どのプレーヤーがゲームに参加または退出したかを把握します。
- ServerStorage:プレイヤーの武器を保管します。
Map Variables/マップ変数
- lobbySpawn、arenaMap、spawnLocations:プレイヤーをさまざまなエリアにテレポートするために使用します。
Player Variables/プレイヤー変数
- activePlayers:試合に参加しているプレイヤーを追跡します。
local PlayerManager = {}

-- Services
local Players = game:GetService("Players")
local ServerStorage = game:GetService("ServerStorage")
-- Map Variables
local lobbySpawn = workspace.Lobby.StartSpawn
local arenaMap = workspace.Arena
local spawnLocations = arenaMap.SpawnLocations
-- Player Variables
local activePlayers = {}

-- Local Functions

-- Module Functions

return PlayerManager- 内部にテスト表示を含む sendPlayersToMatch() という名前のモジュール関数を作成します。
-- Local Functions

-- Module Functions
function PlayerManager.sendPlayersToMatch()
    print("Sending players to match")
end

return PlayerManager
ロビーでプレイヤーをスポーンする
現在、スポーンする場所は複数あります。つまり、プレイヤーはゲームに参加するときにランダムにスポーンします。プレーヤーがロビーにスポーンするようにするには、プレーヤーの RespawnLocation プロパティを変更します。
- player のパラメーターを使用して、onPlayerJoin() という名前の新しいローカル関数を作成します。この関数で、プレイヤーのリスポーン位置を、以前に作成したロビーのスポーン変数に設定します。
-- Local Functions
local function onPlayerJoin(player)
    player.RespawnLocation = lobbySpawn
end- モジュール関数の下に、イベントセクションを追加します。そして、onPlayerJoin() を、Players の PlayerAddedイベントに接続します。
-- Module Functions
function PlayerManager.sendPlayersToMatch()
  print("Sending players to match")
end

-- Events
Players.PlayerAdded:Connect(onPlayerJoin)
接続とテスト
これでモジュールを接続しテストすることができます。PlayerManager を作成したら、そのモジュールスクリプトのコードを実行し、プレイヤーをロビーに送ることができるよう require で呼び出してください。
- MatchManager に戻り、次の変数を作成します。
- ServerStorage:サービス
- moduleScripts:ModuleScripts のフォルダー(ServerStorage の中にある)
- playerManager:モジュール スクリプト(moduleScripts の中にある)
local MatchManager = {}

-- Services
local ServerStorage = game:GetService("ServerStorage")

-- Module Scripts
local moduleScripts = ServerStorage:WaitForChild("ModuleScripts")
local playerManager = require(moduleScripts:WaitForChild("PlayerManager"))

function MatchManager.prepareGame()
    playerManager.sendPlayersToMatch()
end

return MatchManager
テストするには、少なくとも最小数のプレイヤーがいるローカル サーバーを使用してください。次のことを確認してください。
- すべてのプレイヤーがロビーにスポーンします。
- PlayerManager からの print 文が出力ウィンドウに表示されます。
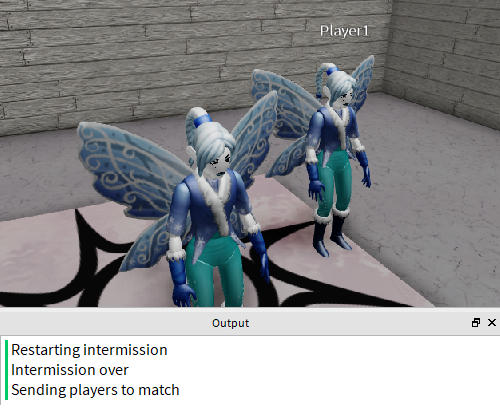
- 完了したら、「Cleanup/クリーンアップ] をクリックしてテストプレイを終了します。
トラブルシューティング
この時点で意図した通りに動作しない場合は、次のいずれかを試してください。
- Arena などのパーツの名前、または Lobby の StartSpawn の場所を確認してください。特に、レッスンでの指示とは異なる名前を付けている場合は注意してください。
- 各スクリプトでモジュールが require() 関数で呼び出されていて、スペルが正しいことを確認してください。
プレイヤーをアリーナに送る
プレイヤーがロビーでスポーンするようになったところで、休憩終了後、試合場にテレポートさせます。player の RespawnLocation を 設定した後に LoadCharacter() という Player オブジェクトの関数を使って、アリーナのスポーン地点に移動させます。
- PlayerManager スクリプトの onPlayerJoin() の下に、preparePlayer() という名前の新しいローカル関数を追加してください。パラメータは player と whichSpawn の2つを使います。
local activePlayers = {}

-- Local Functions
local function onPlayerJoin(player)
    player.RespawnLocation = lobbySpawn
end

local function preparePlayer(player, whichSpawn)

end

-- Module Functions
function PlayerManager.sendPlayersToMatch()
    print("Sending players to match")
end- プレイヤーのリスポーン位置を whichSpawn に設定します。
local function preparePlayer(player, whichSpawn)
    player.RespawnLocation = whichSpawn
end- LoadCharacter() を使用してキャラクターを強制的にリロードすると、プレイヤーは RespawnLocation に設定された地点にリスポーンします。
local function preparePlayer(player, whichSpawn)
    player.RespawnLocation = whichSpawn
    player:LoadCharacter()
end
キャラクターをリロードすることで、プレイヤーはラウンド開始時に用意された道具のみでスタートできるようになります。例えば、このゲームをさらに発展させて、弾薬やピックアップ武器などの道具を追加した場合、キャラクターがそれらの道具を持ち込むことで、不当に有利になる可能性があります。
プレイヤーをスポーンに送る
今現在、ゲームに入っている全てのプレイヤーをアリーナの異なる場所にテレポートさせます。
- sendPlayersToMatch() 関数で、Arena の SpawnLocations フォルダに含まれるすべての子供(SpawnLocation)を取得し、それを arenaSpawns(配列)に入れておきます。
--Module Functions
function PlayerManager.sendPlayersToMatch()
    local arenaSpawns = spawnLocations:GetChildren()
end- Players:GetPlayers() とすると、全プレイヤーをテーブルとして取得できます。テーブル内の要素を1つずつ取得しながらループする場合は、「for ~ in pairs(テーブル) 」を使用するのが便利です。それを1行で記述すると下記のようになります。whichPlayer には 次々と Player オブジェクトが入ります。
function PlayerManager.sendPlayersToMatch()
    local arenaSpawns = spawnLocations:GetChildren()

    for playerKey, whichPlayer in pairs(Players:GetPlayers()) do

    end
end
追跡とスポーン
ゲーム実行時には、どのユーザーがプレイしているのかを識別し、アリーナでスポーンできるようにする必要があります。試合開始時に、すべてのプレーヤーは activePlayers 配列に入れ追跡します。この配列は、テレポートや武器の割り当てなど、さまざまな機能に使用され、試合中にロビーに残っているプレイヤーに影響が及ばないようにします。
- for ループで table.insert() を使用し、 activePlayers 配列に whichPlayer を追加していきます。
function PlayerManager.sendPlayersToMatch()
    local arenaSpawns = spawnLocations:GetChildren()

    for playerKey, whichPlayer in pairs(Players:GetPlayers()) do
        table.insert(activePlayers,whichPlayer)
    end
end- 次にアリーナからスポーン位置を取得します。spawnLocation という変数に arenaSpawns テーブルの1番目の スポーン(SpawnLocation) を代入します。
    for playerKey, whichPlayer in pairs(Players:GetPlayers()) do
        table.insert(activePlayers,whichPlayer)
        local spawnLocation = arenaSpawns[1]
end- whichPlayer と spawnLocation を preparePlayer() に渡して呼び出します。
次に、そのスポーン場所が使用されたので、テーブルから削除して、次のプレイヤーが別のスポーンを取得できるようにします。
for playerKey, whichPlayer in pairs(Players:GetPlayers()) do
    table.insert(activePlayers,whichPlayer)
    local spawnLocation = arenaSpawns[1]
    preparePlayer(whichPlayer, spawnLocation)
    table.remove(arenaSpawns, 1)
end- プレイヤーがアリーナに送られることをローカルサーバーでテストします。プレイヤーをロビーに送り返すコードがまだ配置されていないため、プレイヤーは同じ場所でリスポーンし続けます。
トラブルシューティング
この時点では、思うような結果にならなかった場合は次のいずれかを試してください。
- GetPlayers() では、ステートメントに pairs(Players:GetPlayers()) のように2 つの閉じ括弧があることを確認してください。
- モジュール スクリプト内の一連の関数呼び出しを確認します。例えば matchManager.prepareGame() はplayerManager.sendPlayersToMatch() を呼び出す必要があります。
プレイヤーに武器を与える
試合が開始されると、アリーナ内の各プレイヤーに使用する武器が提供されます。
ツールの追加
プレイヤーの武器は Tool になります。Roblox の、どのツールでも使用できますが、サンプルの剣を用意しました。
- ツールボックスから武器をインポートするか、独自の武器を用意します。
- 武器を ServerStorage に入れます。独自のツールを作成する場合は、後のスクリプトで使用されるため、ツールの名前が Weapon であることを確認してください。

プレイヤーへのツールの提供
ツールがストレージに保存されたところで、それを試合に参加するアクティブプレイヤーに渡します。
- PlayerManager で、ServerStorage の Weapon に playerWeapon という名前の変数を追加します。
-- Map Variables
local lobbySpawn = workspace.Lobby.StartSpawn
local arenaMap = workspace.Arena
local spawnLocations = arenaMap.SpawnLocations

-- Player Variables
local activePlayers = {}
local playerWeapon = ServerStorage.Weapon- preparePlayer() に、次のコードを貼り付けてプレイヤーのキャラクターを取得します。
local function preparePlayer(player, whichSpawn)
   player.RespawnLocation = whichSpawn
   player:LoadCharacter()

   local character = player.Character or player.CharacterAdded:Wait()
end
player.CharacterAdded:Wait()
ゲーム開始時にプレイヤーのキャラクターモデルがロードされていない可能性があります。待ち時間を追加することで、キャラクターがすぐに利用できない場合でも、スクリプトは待機し、エラーを発生させないようにします。
- Clone() 関数を使用して ServerStorage の Weapon のコピーを作成し、sword 変数に代入します。次に、sword の親を Player の Character に設定します。これでプレイヤーに剣が渡せます。
local function preparePlayer(player, whichSpawn)
    player.RespawnLocation = whichSpawn
    player:LoadCharacter()

    local character = player.Character or player.CharacterAdded:Wait()
    local sword = playerWeapon:Clone()
    sword.Parent = character
end- ローカル サーバーでテストして、すべてのプレイヤーがアリーナに送られたときに武器が取得できていることを確認します。テストを続けると、休憩が再開し続けるため、プレイヤーは数秒ごとにリスポーンすることに注意してください。これは次のレッスンで解決します。
完成したスクリプト
ここまでに完成したスクリプトを掲載しますので再確認してください。
GameManager スクリプト
-- Services
local ServerStorage = game:GetService("ServerStorage")
local Players = game:GetService("Players")

-- Module Scripts
local moduleScripts = ServerStorage:WaitForChild("ModuleScripts")
local matchManager = require(moduleScripts:WaitForChild("MatchManager"))
local gameSettings = require(moduleScripts:WaitForChild("GameSettings"))

while true do
    repeat
        wait(gameSettings.intermissionDuration)
        print("Restarting intermission")
    until Players.NumPlayers >= gameSettings.minimumPlayers

    print("Intermission over")
    wait(gameSettings.transitionTime)

    matchManager.prepareGame()
end
MatchManager スクリプト
local MatchManager = {}

-- Services
local ServerStorage = game:GetService("ServerStorage")

-- Module Scripts
local moduleScripts = ServerStorage:WaitForChild("ModuleScripts")
local playerManager = require(moduleScripts:WaitForChild("PlayerManager"))

function MatchManager.prepareGame()
    playerManager.sendPlayersToMatch()
end

return MatchManager
PlayerManager モジュール スクリプト
local PlayerManager = {}
-- Services
local Players = game:GetService("Players")
local ServerStorage = game:GetService("ServerStorage")

-- Map Variables
local lobbySpawn = workspace.Lobby.StartSpawn
local arenaMap = workspace.Arena
local spawnLocations = arenaMap.SpawnLocations

-- Player Variables
local activePlayers = {}
local playerWeapon = ServerStorage.Weapon

-- Local Functions
local function onPlayerJoin(player)
    player.RespawnLocation = lobbySpawn
end

local function preparePlayer(player, whichSpawn)
    player.RespawnLocation = whichSpawn
    player:LoadCharacter()
    local character = player.Character or player.CharacterAdded:Wait()
    local sword = playerWeapon:Clone()
    sword.Parent = character
end

-- Module Functions
function PlayerManager.sendPlayersToMatch()
    print("Sending players to match")

    local arenaSpawns = spawnLocations:GetChildren()

    for playerKey, whichPlayer in pairs(Players:GetPlayers()) do
        table.insert(activePlayers,whichPlayer)
        local spawnLocation = arenaSpawns[1]
        preparePlayer(whichPlayer, spawnLocation)
        table.remove(arenaSpawns, 1)
    end
end

--events
Players.PlayerAdded:Connect(onPlayerJoin)

return PlayerManager
[ 2.ゲームループのコーディング ]
[ 4.タイマーとイベント ]
2 thoughts on “3.プレイヤーの管理”
コメントを残す
コメントを投稿するにはログインしてください。
このスプリクトをコピーしてそのまま使っていいのですか?
こちらはRoblox社が公開しているバトルロイヤルゲームのテンプレートですから自由に使用することができます。